How to Install a Sealing Tester
As a supplier of high - quality sealing testers, I understand that the proper installation of these devices is crucial for accurate and reliable testing results. In this blog post, I will guide you through the process of installing a sealing tester step by step.
1. Preparation
Before you start the installation, it is essential to make sure you have all the necessary tools and equipment. Typically, you will need a set of basic hand tools such as screwdrivers, wrenches, and pliers. Also, ensure that you have read the user manual thoroughly. The user manual contains specific instructions for your particular model of the sealing tester and provides important safety information.
In addition to tools, check the installation site. The area where you plan to install the sealing tester should be clean, dry, and well - ventilated. It should also have a stable surface that can support the weight of the tester. Make sure there is enough space around the tester for easy access during operation and maintenance.
2. Unpacking the Sealing Tester
Carefully unpack the sealing tester from its shipping container. Inspect all the components for any signs of damage during transit. If you find any damaged parts, contact our customer service immediately. We will arrange for replacement parts as soon as possible to ensure that your installation process can proceed smoothly.
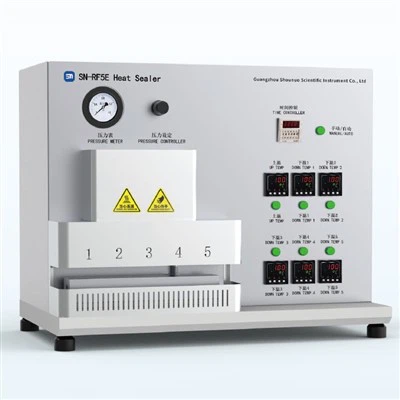
The sealing tester usually comes with several key components, including the main unit, test chambers, control panels, and connecting cables. Lay out all the components on a clean surface and familiarize yourself with each part.
3. Positioning the Main Unit
Place the main unit of the sealing tester on the pre - selected installation surface. Ensure that it is level and stable. Use a spirit level to check if the unit is perfectly horizontal. If it is not, adjust the feet of the unit until it is level. A level unit is important for accurate testing as it ensures uniform pressure distribution within the test chambers.
4. Connecting the Test Chambers
The test chambers are where the actual sealing tests take place. Connect the test chambers to the main unit using the provided connecting cables. Make sure the connections are secure. Loose connections can lead to inaccurate test results or even cause damage to the equipment.
There are different types of test chambers available depending on your testing needs. For example, Package Sealing Tester is designed to test the integrity of package seals, while Seal Strength Tester focuses on measuring the strength of seals.
5. Electrical Connections
Next, it's time to make the electrical connections. First, check the power requirements of your sealing tester. Most sealing testers operate on standard electrical voltages, but it is always important to double - check. Plug the power cord of the main unit into a grounded electrical outlet.
Before turning on the power, ensure that all the switches on the control panel are in the off position. This helps prevent any electrical surges that could damage the equipment.
6. Calibration
Calibration is a critical step in the installation process. It ensures that the sealing tester provides accurate and reliable test results. Follow the calibration procedures outlined in the user manual. This usually involves setting the zero point and adjusting the measurement range.
For example, when using a Package Seal Integrity Tester, you need to calibrate the pressure sensors to accurately detect any leaks in the package seals.
7. Software Installation (if applicable)
Some modern sealing testers come with software that allows for more advanced control and data analysis. If your tester has software, insert the installation disc or download the software from the official website. Follow the on - screen instructions to complete the installation process.
Once the software is installed, connect the tester to your computer using the appropriate cable. This enables you to transfer test data to your computer for further analysis and record - keeping.
8. Testing the Installation
After completing all the installation steps, it's time to test the sealing tester. Turn on the power and follow the startup procedures in the user manual. Run a few test cycles using sample packages or test specimens.
Check the test results to ensure that the tester is working properly. If you encounter any problems during the testing process, refer to the troubleshooting section in the user manual. If the problem persists, contact our technical support team for assistance.
9. Training and Maintenance
To make the most of your sealing tester, it is recommended that your operators receive proper training. We offer training programs either on - site or online to help your staff understand how to operate the tester correctly and interpret the test results.


Regular maintenance is also essential to keep the sealing tester in good working condition. Follow the maintenance schedule in the user manual, which includes tasks such as cleaning the test chambers, checking the cables for wear and tear, and replacing any consumable parts.
Conclusion
Installing a sealing tester may seem like a complex process, but by following these steps, you can ensure a smooth and successful installation. As a supplier of sealing testers, we are committed to providing you with high - quality products and excellent after - sales service.
If you are interested in purchasing a sealing tester or have any questions about the installation process, please feel free to contact us. Our sales team is ready to assist you with all your procurement needs and answer any queries you may have.
References
- User manuals of various sealing testers
- Industry standards related to sealing testing and equipment installation