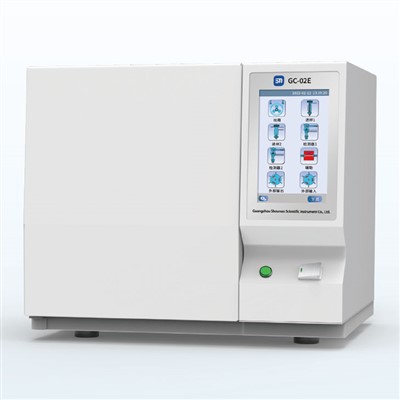
Maintaining the optimal performance of a Gas Chromatography (GC) Analyzer is crucial for accurate and reliable analytical results. As a leading GC Analyzer supplier, we understand the importance of proper cleaning and maintenance to ensure the longevity and efficiency of these sophisticated instruments. In this blog, we will guide you through the step-by-step process of cleaning a GC Analyzer, providing you with valuable insights and best practices.
Understanding the Importance of Cleaning
Before delving into the cleaning process, it's essential to understand why regular cleaning is necessary. Over time, contaminants such as sample residues, dust, and debris can accumulate within the GC Analyzer, affecting its performance and accuracy. These contaminants can cause issues such as baseline noise, peak tailing, and reduced sensitivity, leading to inaccurate analytical results. Additionally, dirty components can increase the risk of instrument failure and downtime, resulting in costly repairs and lost productivity.
By implementing a regular cleaning schedule, you can prevent these issues and ensure that your GC Analyzer operates at its best. Cleaning not only improves the performance and accuracy of the instrument but also extends its lifespan, reducing the need for frequent replacements and saving you money in the long run.
Preparing for Cleaning
Before you begin cleaning your GC Analyzer, it's important to take the necessary precautions to ensure your safety and the integrity of the instrument. Here are some steps to follow:
- Read the User Manual: Familiarize yourself with the manufacturer's instructions and safety guidelines for cleaning your specific GC Analyzer model. The user manual will provide you with detailed information on the recommended cleaning procedures, cleaning agents, and safety precautions.
- Turn Off the Instrument: Before cleaning, make sure to turn off the GC Analyzer and disconnect it from the power source. This will prevent any electrical hazards and ensure your safety during the cleaning process.
- Wear Protective Gear: To protect yourself from potential hazards, such as chemicals and sharp objects, wear appropriate protective gear, including gloves, safety glasses, and a lab coat.
- Gather the Necessary Supplies: Collect all the cleaning supplies you will need, including cleaning agents, brushes, wipes, and a vacuum cleaner. Make sure to use cleaning agents that are compatible with the materials used in your GC Analyzer to avoid damage.
Cleaning the Exterior
The first step in cleaning a GC Analyzer is to clean the exterior of the instrument. This will remove any dust, dirt, or debris that has accumulated on the surface and prevent it from entering the internal components. Here's how to clean the exterior:


- Use a Soft Cloth: Dampen a soft cloth with a mild cleaning solution, such as a mixture of water and mild detergent. Wipe the exterior of the GC Analyzer, including the front panel, sides, and back, to remove any dirt or stains.
- Clean the Display Screen: If your GC Analyzer has a display screen, use a soft, lint-free cloth to clean the screen. Avoid using abrasive cleaners or rough materials, as these can scratch the screen and damage the display.
- Remove Dust from Vents: Use a can of compressed air or a vacuum cleaner with a soft brush attachment to remove any dust or debris from the vents on the sides and back of the GC Analyzer. This will prevent the vents from becoming clogged and ensure proper ventilation.
Cleaning the Injection Port
The injection port is one of the most critical components of a GC Analyzer, as it is responsible for introducing the sample into the instrument. Over time, the injection port can become contaminated with sample residues, which can affect the accuracy and reproducibility of the analytical results. Here's how to clean the injection port:
- Remove the Septum: The septum is a rubber or silicone disk that seals the injection port and prevents sample leakage. Remove the septum from the injection port using a septum remover tool.
- Clean the Septum Nut and Liner: Use a soft brush or a lint-free cloth to clean the septum nut and liner. Remove any sample residues or debris that have accumulated on the surfaces.
- Replace the Septum: If the septum is damaged or worn out, replace it with a new one. Make sure to use a septum that is compatible with your GC Analyzer model.
- Clean the Injection Port Liner: The injection port liner is a small tube that is inserted into the injection port to protect the column from contamination. Remove the liner from the injection port and clean it using a solvent, such as acetone or methanol. Make sure to rinse the liner thoroughly with the solvent and allow it to dry completely before reinstalling it.
Cleaning the Column
The column is the heart of a GC Analyzer, as it is responsible for separating the components of the sample based on their physical and chemical properties. Over time, the column can become contaminated with sample residues, which can affect the separation efficiency and resolution of the analytical results. Here's how to clean the column:
- Remove the Column: Before cleaning the column, make sure to turn off the GC Analyzer and allow it to cool down. Remove the column from the instrument using the appropriate tools, such as a column wrench or a column cutter.
- Flush the Column: Once the column is removed, flush it with a suitable solvent, such as acetone or methanol, to remove any sample residues or contaminants. Make sure to use a solvent that is compatible with the stationary phase of the column.
- Bake Out the Column: After flushing the column, bake it out at a high temperature to remove any remaining contaminants. Follow the manufacturer's instructions for the recommended bake-out temperature and time.
- Reinstall the Column: Once the column has been cleaned and baked out, reinstall it in the GC Analyzer using the appropriate tools. Make sure to tighten the column connections securely to prevent any leaks.
Cleaning the Detector
The detector is another critical component of a GC Analyzer, as it is responsible for detecting and measuring the separated components of the sample. Over time, the detector can become contaminated with sample residues, which can affect the sensitivity and accuracy of the analytical results. Here's how to clean the detector:
- Turn Off the Detector: Before cleaning the detector, make sure to turn off the GC Analyzer and allow it to cool down. Turn off the detector and disconnect it from the power source.
- Remove the Detector Cell: Depending on the type of detector, you may need to remove the detector cell from the instrument. Follow the manufacturer's instructions for the recommended procedure.
- Clean the Detector Cell: Use a soft brush or a lint-free cloth to clean the detector cell. Remove any sample residues or debris that have accumulated on the surfaces.
- Rinse the Detector Cell: Rinse the detector cell with a suitable solvent, such as acetone or methanol, to remove any remaining contaminants. Make sure to rinse the cell thoroughly with the solvent and allow it to dry completely before reinstalling it.
- Reinstall the Detector Cell: Once the detector cell has been cleaned and dried, reinstall it in the GC Analyzer. Make sure to connect the detector to the power source and turn it on.
Cleaning the Oven
The oven is another important component of a GC Analyzer, as it is responsible for heating the column and the sample to the desired temperature. Over time, the oven can become contaminated with sample residues, which can affect the temperature control and stability of the instrument. Here's how to clean the oven:
- Turn Off the Oven: Before cleaning the oven, make sure to turn off the GC Analyzer and allow the oven to cool down. Turn off the oven and disconnect it from the power source.
- Remove the Column and Liners: Remove the column and liners from the oven using the appropriate tools. This will prevent them from being damaged during the cleaning process.
- Clean the Oven Interior: Use a soft brush or a lint-free cloth to clean the interior of the oven. Remove any sample residues or debris that have accumulated on the walls, floor, and ceiling of the oven.
- Vacuum the Oven: Use a vacuum cleaner with a soft brush attachment to remove any remaining dust or debris from the oven. Make sure to vacuum the corners and edges of the oven thoroughly.
- Reinstall the Column and Liners: Once the oven has been cleaned, reinstall the column and liners in the oven. Make sure to connect the column to the injection port and the detector.
Maintaining a Cleaning Schedule
To ensure the optimal performance and longevity of your GC Analyzer, it's important to establish a regular cleaning schedule. The frequency of cleaning will depend on the usage of the instrument and the type of samples being analyzed. Here are some general guidelines for maintaining a cleaning schedule:
- Daily Cleaning: After each use, wipe down the exterior of the GC Analyzer with a soft cloth to remove any dust or debris. Check the injection port and the septum for any signs of contamination and replace the septum if necessary.
- Weekly Cleaning: Once a week, clean the injection port liner and the detector cell using the appropriate cleaning agents. Check the column for any signs of contamination and replace it if necessary.
- Monthly Cleaning: Once a month, clean the oven interior and the vents to remove any dust or debris. Check the gas lines for any leaks or blockages and replace them if necessary.
- Annual Maintenance: Once a year, have your GC Analyzer serviced by a qualified technician. The technician will perform a comprehensive maintenance check, including cleaning all the internal components, calibrating the instrument, and replacing any worn-out parts.
Conclusion
Cleaning a GC Analyzer is an essential part of maintaining its optimal performance and accuracy. By following the steps outlined in this blog, you can ensure that your GC Analyzer operates at its best and provides you with reliable analytical results. Remember to always read the user manual and follow the manufacturer's instructions and safety guidelines when cleaning your GC Analyzer.
If you are in the market for a new GC Analyzer or need assistance with cleaning and maintenance, we are here to help. As a leading [Link to our company website] supplier, we offer a wide range of high-quality Link text: GC-05E Gas Chromatograph, Link text: GC-06E Gas Chromatograph, and Link text: Chromatography Equipment to meet your specific needs. Contact us today to learn more about our products and services and to discuss your requirements with our experienced team of experts.
References
- [List of references used in the blog, such as user manuals, technical documents, and scientific articles]